


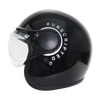


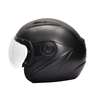


Keep Your Helmet Maintained and Road-Ready: The Ultimate Cleaning Guide
A helmet isn’t just an accessory; it’s your lifeline on every ride. Keeping it clean and maintained makes a huge difference to your comfort and safety on the road. But dirt, sweat, and grime build up over time, affecting visibility and hygiene. But cleaning your helmet is an easy task that can be done at home with minimal effort.
In this guide, you’ll discover how to clean a helmet inside and out – with easy-to-follow tips. From scrubbing the visor to refreshing the padding, we’ll cover everything you need to know to prepare your helmet for your next ride.
Step-by-Step Guide to Cleaning the Helmet’s Exterior
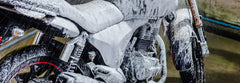
The outside of your helmet is exposed to dirt, grime, and weather. Keeping it clean prevents materials from building up that can weaken the shell over time. A clean helmet means better aerodynamics and less wear and tear on the paint.
Below is a step-by-step guide on how to clean a helmet on the outside so it stays shiny and functional.
-
Removing Loose Dirt
The first step in cleaning your helmet is to remove loose dirt and dust. Here’s how:
- Use a soft, dry microfiber cloth to wipe away dust.
- For stubborn dirt, dampen the cloth with water and wipe the helmet surface.
- Don’t use any abrasive cleaners, as they will scratch the helmet’s finish.
-
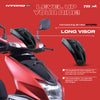
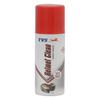
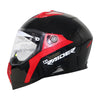
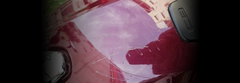
Cleaning the Visor

The visor is vital to visibility and needs to be cleaned regularly. Here’s how to clean a helmet visor without damaging it:
- Remove the visor from the helmet (check your helmet’s manual for instructions).
- Spray cleaning solution specifically designed for visors and wipe the visor with a soft cloth in a circular motion.
- Use non-abrasive clothes to ensure you don’t scratch the visor.
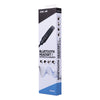
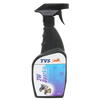
Try out the TVS Shine Kit with a gentle cleaning solution that leaves your visor spotless and reduces the chance of scratches while cleaning.
-
Removing Stickers/Decals
If you have stickers on your helmet, they will start to peel or look worn over time. Here’s how to remove them safely:
- Use a hairdryer to warm the sticker for a few seconds — this will loosen the adhesive.
- Peel it off slowly with your fingers or a plastic scraper.
- Wipe away the adhesive residue with a cloth dampened with a gentle cleaning solution.
-
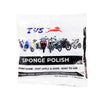
Buffing for Shine
Now that your helmet is free of dirt and stickers, it’s time to bring the shine back and protect it from minor scratches.
- To achieve that glossy finish, apply a small amount of Shine Wax to a soft cloth.
- Buff the helmet in circular motions.
- Let the polish dry and then wipe off any excess with a clean cloth.
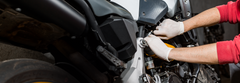
Cleaning the Helmet’s Interior
The inside of your helmet comes in contact with sweat, oils and odours over time. It’s important to clean it properly to maintain comfort and hygiene. Whether your helmet has removable or non-removable padding, this section will show you how to clean the helmet from inside and make it feel like new again.
-
Removing the Liner and Padding
Many helmets have removable liners and padding which makes the cleaning process easier:
- Remove the liner and padding from the helmet (refer to your helmet’s manual).
- Shake off any loose dirt or debris.
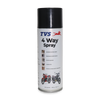
- Put the liner and padding into a sink filled with warm water and a mild detergent; or use a Helmet Care Kit that comes with a helmet cleaner.
-
Washing & Drying the Inside
After removing the padding, washing it is crucial. Here’s how to wash helmet padding to get rid of any lingering odours and grime. uch-up paint is dry, you’ll need to apply a clear coat to seal and protect the painted surface. This will also give the bike a smooth finish.
- Gently scrub the padding with your hands, focusing on areas that can contain sweat buildup.
- Rinse out all the soap and hang the padding to dry.
- Don’t put it in direct sunlight as this can damage the fabric.
-
Cleaning Non-Removable Padding
For helmets with non-removable padding, you’ll need to do it use a different approach:
- Soak a soft brush or cloth with mild soap to scrub the inside of the helmet.
- Wipe down the inside with the damp cloth to remove any soap.
- Leave the helmet in a well-ventilated area to dry completely.
Maintaining the Helmet’s Visor
The visor is your window to the road. A well-maintained visor not only improves your visibility but also prevents scratches, fogging or sun damage. Let’s see how you can keep your visor perfect for every ride.
-
Anti-Fog Coatings
Fogging can be a big problem, especially during colder months. Applying anti-fog coatings takes two minutes and can keep your visor fog-free during every ride.
All you need to do is apply a thin layer of anti-fog spray or coating for visors. Buff the surface gently and wait for it to dry before you head out.
-
Visor Replacement
Visors can get scratched beyond repair over time. When that happens, it’s better to replace them. Make sure you buy the new visor from the same brand and make of your helmet. Follow the helmet’s manual to remove the old visor. Replacing a worn visor regularly keeps your visibility sharp and reduces glare on the road from scratches.
-
Using a Visor Shield or Film
If you want extra protection, try using a visor shield or film. Visor shields and films are easy to apply and will save you from having to replace your visor so often. They also offer an extra layer of protection against scratches and UV damage.
Keep your helmet in top shape with the TVS Maintenance Kit!
Helmet Maintenance Tips to Keep in Mind
Learning how to clean a helmet is just the beginning. Regular helmet maintenance is key to its durability and protection. These tips will help you keep your helmet in top shape and extend its life, ensuring your safety on the road.
-
Inspect Straps and Buckles
A helmet is only as good as its straps and buckles. Over time, wear and tear on the helmet strap can compromise your safety during accidents. This makes it essential to:
- Check for fraying or looseness in the straps
- Make sure the buckle moves smoothly without sticking or jamming
- Replace worn-out parts immediately to ensure a snug fit
-
Maintaining Ventilation Systems

Proper ventilation is crucial for a comfortable ride, especially during long journeys. Make sure to -
- Check your helmet’s vents to make sure they’re dust and debris-free.
- Use a soft brush or compressed air to clear any blockages.
- Keep the vents clear to improve airflow and reduce sweat buildup inside the helmet.
-
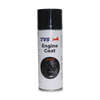
Applying a Protective Coating
A protective coat keeps your helmet looking new and adds an extra layer of protection against daily wear and tear.
- Use a helmet-specific protective spray or wax to prevent scratches and UV damage.
- Apply a thin layer and buff with a clean cloth.
- Reapply every few months, depending on the conditions you ride in.
-
Storing Your Helmet Properly
How you store your helmet can make a big difference to its longevity. Storing your helmet properly will keep it in good condition and ready to use whenever you hit the road.
- Store it in a cool, dry place out of direct sunlight
- Use a Helmet Bag for extra protection against dust and scratches when not in use.
- Don’t put heavy objects on top of your helmet; this can deform the shell over time.
Conclusion
Knowing how to clean a helmet properly can go a long way in maintaining its appearance and safety features. A maintained helmet means clear vision, better airflow and, most importantly, protection on the road. Follow these simple steps and you’ll keep your helmet fresh and road-ready and your rides will be safer and more fun.
For riders looking to gear up their rides with quality accessories, TVS Motors has got you covered. From helmet care kits to bike maintenance essentials, you’ll find everything you need to keep your gear in top condition. Check out our entire range of riding accessories and bike care products to ride smoother and safer.

 By
By


1 comment
check